How to use Unpivot in Excel to flatten data in tables
Some of you will already know about unpivoting data in Excel but for many, this is a game-changer that can save hours and hours of manual work for timekeeping and payroll teams.
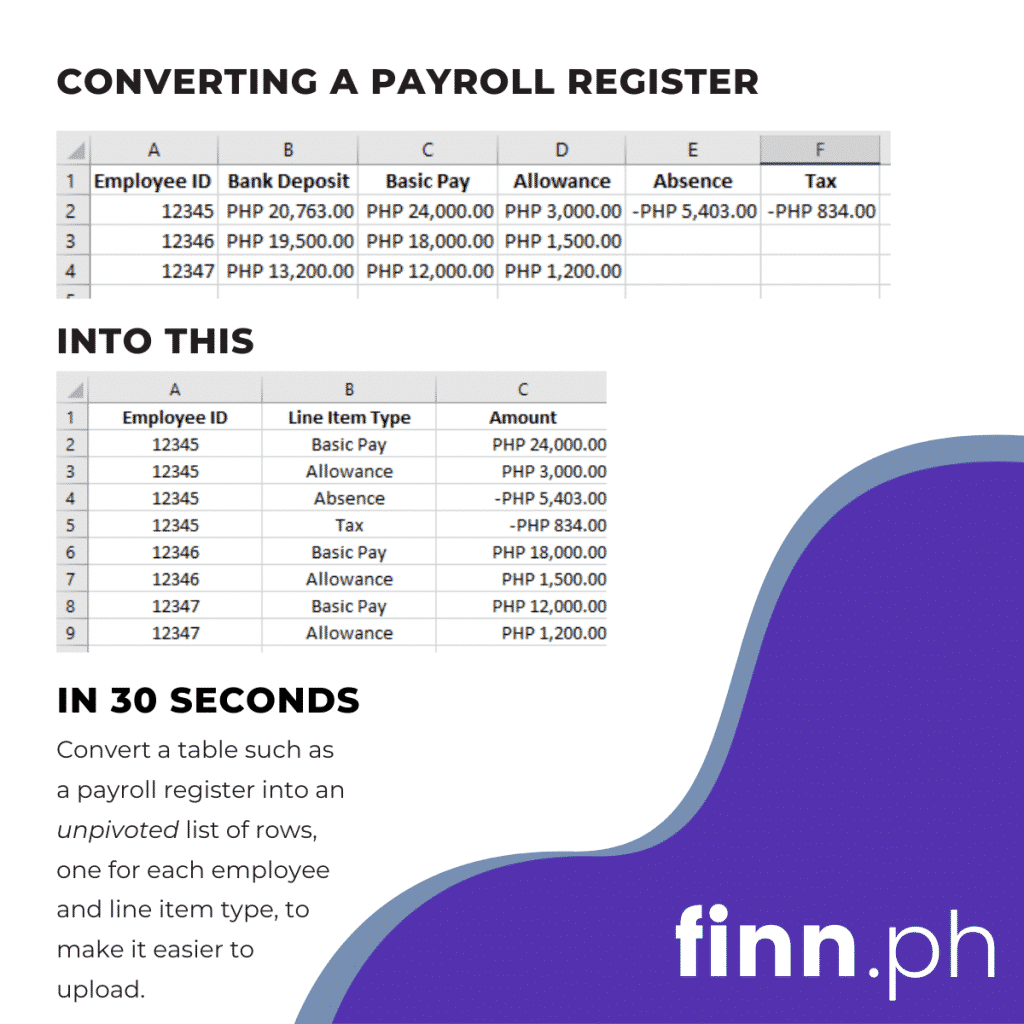
A common scenario for people working in timekeeping and payroll is the need to convert data into formats for upload to a system. One example is converting a payroll register into a flattened format such as the example below.

I’m not afraid to admit that once upon a time I would copy the first column and paste it down the bottom of the file. I’d then do the same for each column which for large files could take 10-15 minutes.
Then I discovered how to convert the data in Excel using just a few clicks.
The full process
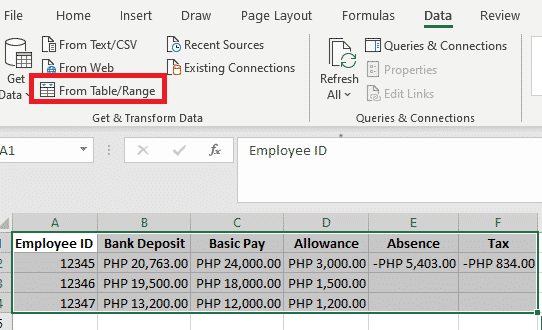
Open your Excel file and highlight the cells that contain your data.
Click the Form Table/Range button from the Get Data section of the toolbar ribbon.

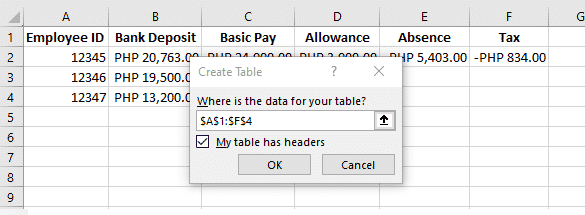
Confirm the selection and click OK.

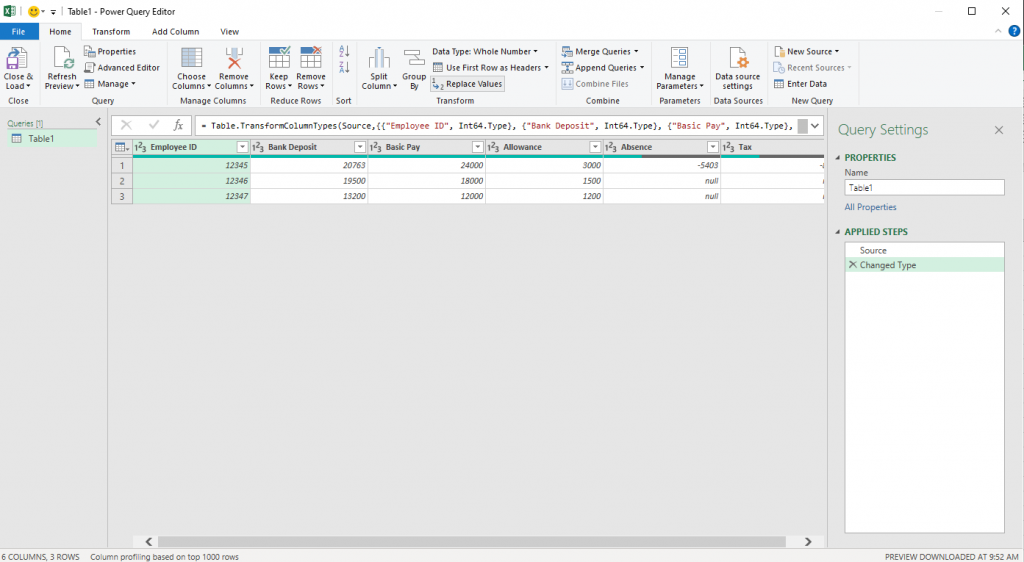
The Power Query Builder will now open.

Highlight all the columns except the unique identifier, in this case it is Employee ID

Click Unpivot Columns from the Transform tab on the ribbon toolbar.

You now have the data in a flattened format.

Click on the Attribute column filter and exclude any rows you don’t want. In my case, I removed the Bank Deposit amount as it is just the sum of the rows.

Click Close and Load

… and you are done! You now have the data in a flattened format ready for upload

We hope this feature in Excel saves you some time, so good luck with your unpivoting. 🙂
When you use Finn to process payroll, you don't to manually convert data into formats.
When a new client launches with Finn, we create custom uploaders based on the existing data formats you use in your company. Let Finn eliminate the manual work for you.


